Skip flashing unused blocks with UUU
TL;DR: UUU does now (or will shortly) support blockmaps for flashing images. Use it. It will shorten your flashing time *a lot.*
It will soon be time to manufacture circuit boards for a project I'm currently working on. After manufacturing, it will need some firmware for sure, but how do we flash it in the most efficient way? The board is based on an i.MX.8 chip from NXP and has an eMMC as storage medium.
Overall, short iteration is nice to have as it will benifit the development cycles for the developers on a daily basis, but the time it takes to flash a device with its firmware is not just "nice to have" in the production line, it's critical. We do not want to have a (another?) bottleneck in the production line, so we have to make some effort to make it as fast as possible.
The Scenario
The scenario we have in front of us is that:
- We want to write a full disk image to the eMMC in the production
- Most space in the disk image is reserved for empty partitions
- The disk image is quite big (~12GB)
- Only ~2GB is of the disk image is "real data" (not just chunks of zeros)
- Flash firmware to eMMC takes ~25min which is unacceptable
Sparse files is to me a very familiar concept and the .wic file created by the Yocto project is indeed a sparse file. But the flashing tool (UUU) did not seems to support write sparse images without expanding them (that is not completely true, as we will see).
To speed up the production line, I thought of several different solutions including:
- Do not include empty partitions in the .wic file, create those at the first boot instead
- Only use UUU to boot the board and then flash the disk image using dfu-utils
- ...
But all have its own drawbacks. Best would be if we could stick to a uniform way of flashing everything we need, and UUU will be needed regardless.
Before we go any further, lets look at what a sparse file is.
Sparse images
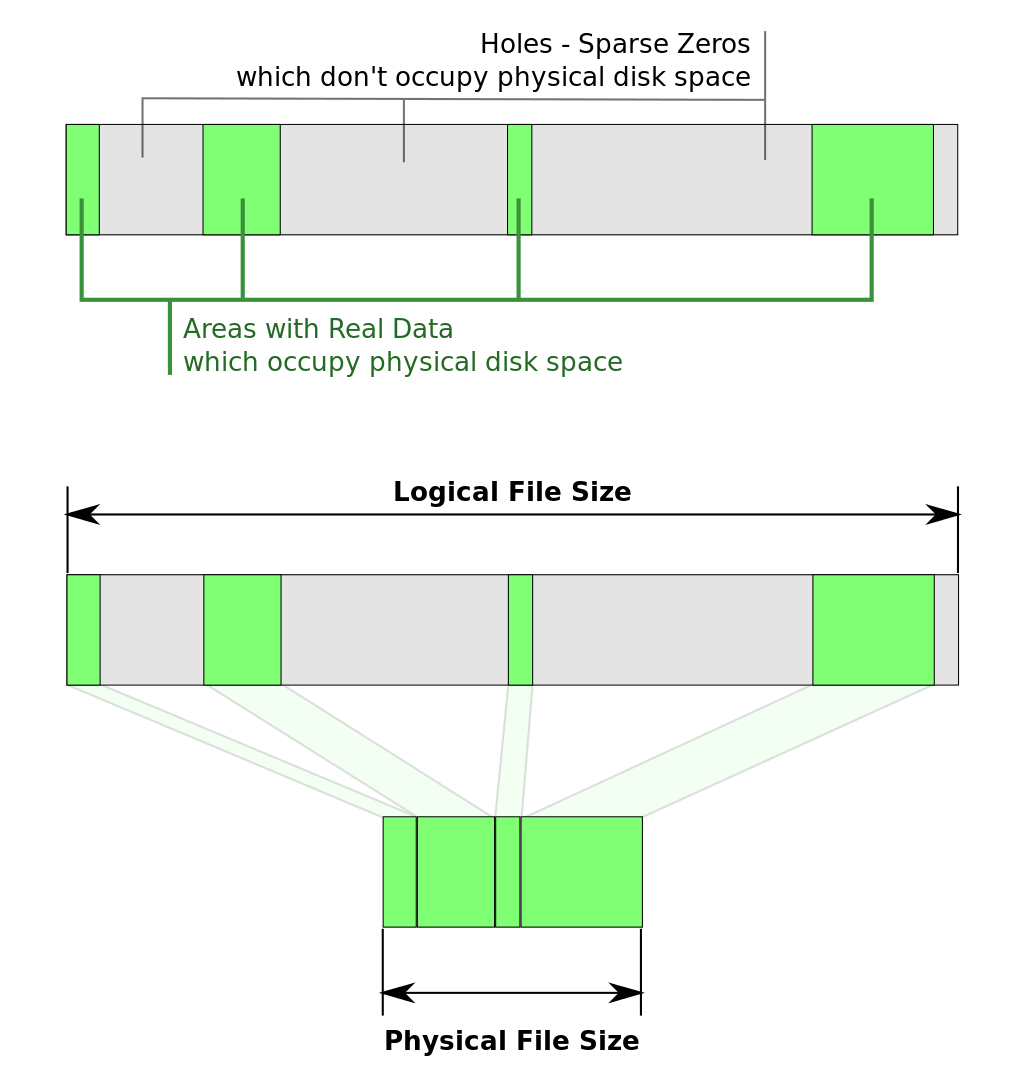
A sparse image is a type of file that contains metadata to describe empty sections (let's call them holes) instead of filling it up with zeros (that take up actual space). The advantage is that sparse files only take as much space as they actually need.
For example; If the logical file size is, say 128 GiB, and the areas with real data is only 8GiB, the physical file size will only be 8GiB+metadata. The allocated size are significantly reduced compared to a full 128GiB image.
Most of the filesystems in Linux (btrfs, XFS, ext[234], ...) and even Windows (NTFS) handle sparse files transparently to the user. This means that the filesystem will not allocate more memory than necessary. Reading these holes returns just zeros, and the filesystem will allocate blocks on the filesystem only when someone actually writes to those holes.
Think on it as the Copy-On-Write (COW) feature that many modern filesystems implements.
An example
It could be a little bit confusing when trying to figure out the file size for sparse files.
For example, ls reports 14088667136 bytes, which is quite a big file!
$ ls -alrt image.wic
-rw-r--r-- 1 marcus marcus 14088667136 12 dec 11.08 image.wic
But du only reports 1997888 bytes?!
$ du  image.wic
1997888    image.wic
To get the real occupied size, we need to print the allocated size in blocks (-s):
$ ls -alrts image.wic
1997888 -rw-r--r-- 1 marcus marcus 14088667136 12 dec 11.08 image.wic
If you want to see it with your own eyes, you can easily create a 2GB file with the truncate command:
$ truncate  -s  2G image.sparse
$ stat image.sparse
  File: image.sparse
    Size: 2147483648	Blocks: 0          IO Block: 4096   regular file
As you can see, the file size is 2GB, but it occupies zero blocks on the disk. The file does only consists of a big chunk of zeros which is described in the metadata.
Handle the holes with care
It's easy to expand the sparse files if you are not careful. The most common applications that is used to copy files have a --sparse option to preserve the holes. If not used, it will allocate blocks and fill them out with zeros. For some applications the --sparse option is set as their default behavior, e.g., see the relevant part of the manpage for cp(1):
--sparse=WHEN
              control creation of sparse files. See below

 ...
 By default, sparse SOURCE files are detected by a crude heuristic and the corresponding DEST file is made sparse as well.
 That  is  the  behavior  selected  by --sparse=auto.
 Specify --sparse=always to create a sparse DEST file whenever the SOURCE file contains a long enough sequence of zero bytes.
 Use --sparse=never to inhibit creation of sparse files.
While some applications does not use it as default, e.g. rsync(1):
--sparse, -S
        Try to handle sparse files efficiently so they take up less space on the destination.  If combined with --inplace the file created might not end  up  with
        sparse  blocks  with some combinations of kernel version and/or filesystem type.  If --whole-file is in effect (e.g. for a local copy) then it will always
        work because rsync truncates the file prior to writing out the updated version.

        Note that versions of rsync older than 3.1.3 will reject the combination of --sparse and --inplace.
All kind of compression/decompression of files usually expands sparse files as well.
Yocto
Yocto supports OpenEmbedded Kickstart Reference (.wks) to describe how to create a disk image.
A .wks file could look like this:
part u-boot --source rawcopy --sourceparams="file="${IMAGE_BOOTLOADER}   --no-table    --align ${IMX_BOOT_SEEK}
part /boot  --source bootimg-partition                        --fstype=vfat --label boot --active --align 8192 --size 64
part        --source rootfs                                   --fstype=ext4 --label root    --align 8192 --size 1G
part                                                          --fstype=ext4 --label overlay --align 8192 --size 500M
part /mnt/data                                                --fstype=ext4 --label data --align 8192 --size 10G
bootloader --ptable msdos
The format is rather self explained. Pay some attention to the --size parameters. Here we create several (empty) partitions which is actually quite big.
The resulting image occupy 14088667136 bytes in total, but only 1997888 bytes is non-sparse data.
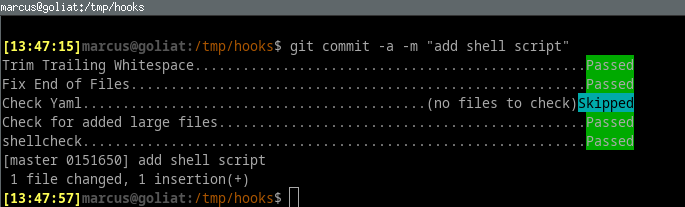
Yocto is able to generate a block map file using the bmaptool for the resulting ẁic` file. Just specify that you want to generate a wic.bmap image among your other fs types:
IMAGE_FSTYPES = "wic.gz wic.bmap"
UUU
The Universal Update Utility (UUU) is a image deploy tool for Freescale/NXP I.MX chips. It allows downloading and executing code via the Serial Download Protocol (SDP) when booted into manufacturing mode.
The tool let you flash all of most the common types of storage devices such as NAND, NOR, eMMC and SD-cards.
That is good, but the USB-OTG port that is used for data transfer is only USB 2.0 (Hi-Speed) which limit the transfer speed to 480Mb/s.
A rather common case is to write a full disk image to a storage device using the tool. A full disk image contains, as you may guessed, a full disk, this includes all unpartionated data, partition table, all partitions, both those that contains data and eventually any empty partitions. In other words, if you have a 128MiB storage, your disk image will occupy 128MiB, and 128MiB of data will be downloaded via SDP.
Support for sparse files could be handy here.
UUU claims to support sparse images by its raw2sparse type, but that is simply a lie, the code that detects continous chunks of data is actually commented out for unknown reason:
//int type = is_same_value(data, pheader->blk_sz) ? CHUNK_TYPE_FILL : CHUNK_TYPE_RAW;
int type = CHUNK_TYPE_RAW;
Pending pull request
Luckily enough, there is a pull request that add support for using bmap files with UUU!
The PR is currently (2023-12-11) not merged but I hope is is soon. I've tested it out and it works like a charm.
EDIT: The PR was merged 2023-12-12, one day after I wrote this blog entry :-)
With this PR you can provide a bmap file to the flash command via the -bmap <image> option in your .uuu script. E.g. :
uuu_version 1.2.39

SDPS: boot -f ../imx-boot

FB: ucmd setenv emmc_dev 2
FB: ucmd setenv mmcdev ${emmc_dev}
FB: ucmd mmc dev ${emmc_dev}
FB: flash -raw2sparse -bmap rawimage.wic.bmap all rawimage.wic
FB: done
It cut the time flashing down to a sixth!
As this is a rather new feature in the UUU tool, I would like to promote it and thank dnbazhenov @Github for implement this.
References